SnapCal Setup
Please complete these steps using your Computer (PC/Mac).
🛡️ Our Privacy Promise: You Own Your Data
Unlike other smart devices, SnapCal does not use a central server to read your schedule. Instead, we guide you to create your own personal backend. While this setup takes a few extra minutes, it guarantees that only you and your SnapCal can access your calendar. Your data security and privacy are our highest priorities.
Create Your Backend
We need a free Google Script to process your calendar and weather data.
Click to Create ScriptGoogle will ask you to "Make a copy". Click it to open your setup sheet.
Configure Settings
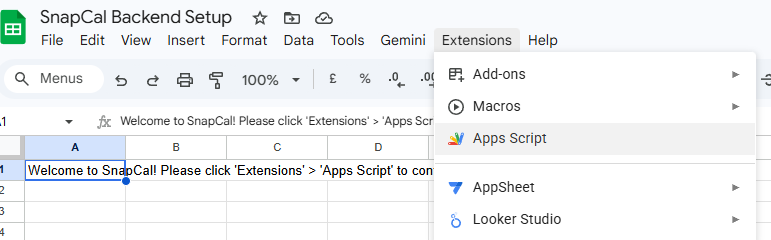
1. In the Google Sheet that opened, click Extensions → Apps Script.
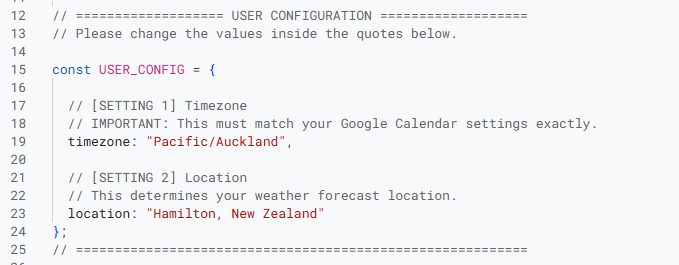
2. In the code editor, locate the USER_CONFIG section. You will need to replace the default timezone and location with your own.
🔍 Search for your city below to auto-generate your codes:
⏰ 1. Timezone (Line 19)
Click the blue box to copy, then paste it into Line 19:
"Detecting..."
📍 2. Location (Line 23)
Click the green box to copy, then paste it into Line 23:
"Detecting..."
💡 Global Support: Type your city in ANY language (e.g., 中文, 日本語). We will auto-translate it to English and find the correct timezone!
Remember to click the 💾 Save icon after editing the code.
Deploy & Get URL
Now, let's put your script online:
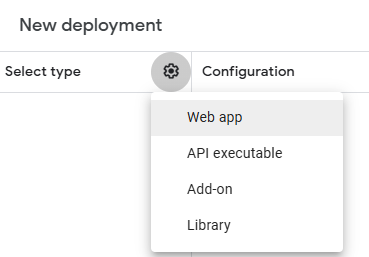
- Click Deploy (top right) → New deployment.
- Click the gear icon ⚙️ → Select Web app.
- Set Who has access to Anyone.
- Click Deploy.
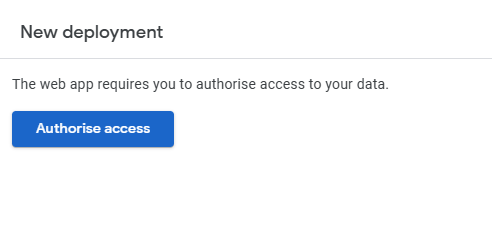
During deployment, Google will ask for permission to access your data. Click Authorise access.
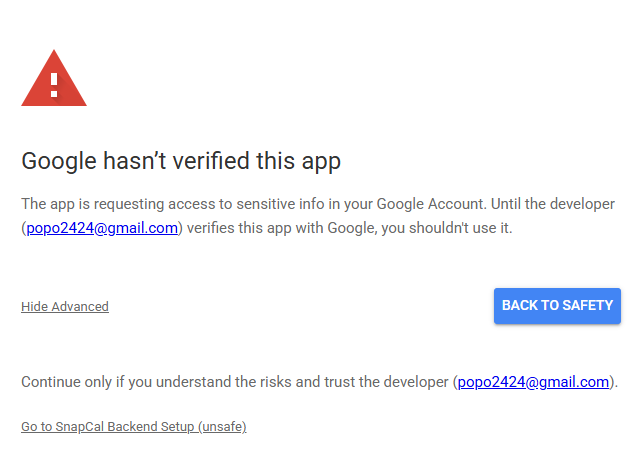
 If you see a scary "Google hasn't verified this app" screen, please do not panic! Here is why:
Because you made a copy of the script in Step 1, it now lives securely in your own Google account. To Google's automated system, this looks like an "unverified" custom program. Even though you are both the developer and the user (you will see your own email listed), Google still shows this red warning to be strictly safe.
Rest assured, your data is exclusively authorized to your own private URL. No one else will ever have access to it.
To proceed: Click Advanced ➔ Go to ... (unsafe) ➔ Allow.
- Click Copy to copy the Web App URL.
✅ Check your URL: A valid Web App URL always ends with /exec and looks like this:
Connect SnapCal
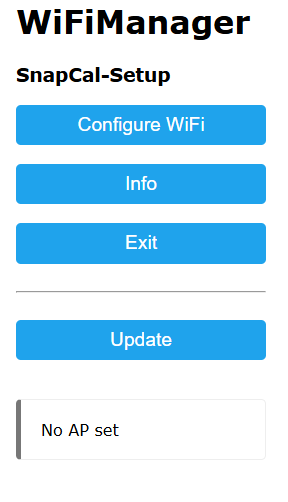
For first-time use, we need to power on the device and activate setup mode:
- Plug in your SnapCal via USB to ensure it has sufficient power.
- Press the Refresh button on the device. It will now broadcast its setup network.
- On this computer, click the WiFi icon and connect to: SnapCal-Setup.
- A setup page will open automatically.
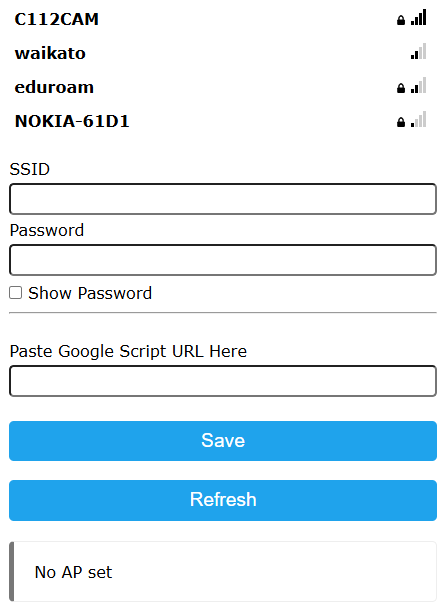
(If not, type 192.168.4.1 in your browser) - Click Configure WiFi.
- Select your home WiFi, enter the password, and PASTE the Web App URL you copied in Step 3 into the "Script URL" box.
- Click Save.
See the visual guide below for reference:
① Click Configure WiFi
② Select WiFi, Paste URL & Save
🎉 Your computer will return to your home WiFi, and SnapCal will begin updating!